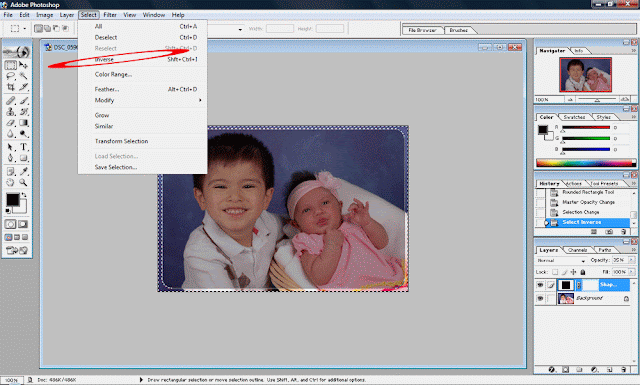
Learn how to go from this…
To this…
It’s super easy, and it gives your photos a “finished” look.
Open up your photo in photoshop.
On the tools window, select the Rounded Rectangle Tool. Adjust the radius of your rectangle to 20px (or more if you like it rounder) Draw a rounded rectangle around the parts of the image you want. (note: if you change the opacity of the rounded rectangle, you’ll be able to see what will be kept and what will be discarded.)
Next using the keyboard shortcut, hold down the “Ctrl” and “Alt” key at the same time while also clicking on the rounded rectangle layer on your layers palette. You'll know you’ve done it correctly when you see the dashed lines around your rounded rectangle.
With your rounded rectangle still selected, go to Select --> Inverse.
Now click on the photo in your layers palette. Then hit “Del”. Now go back to Select --> Deselect
Crop away the white area… and there you have it!
That was pretty easy, no? Now go and try it out for yourselves.


No comments:
Post a Comment